How to Start Seeds

In this post we will be sharing with you how to start seeds. It is a wonderful time of year to get your hands dirty and get your garden prepped for summer planting. And there is nothing more rewarding than knowing that you started all of the plants you grow in your garden and flower beds. Give it a try and you’re sure to fall in love with gardening, too!

Spring is Here!

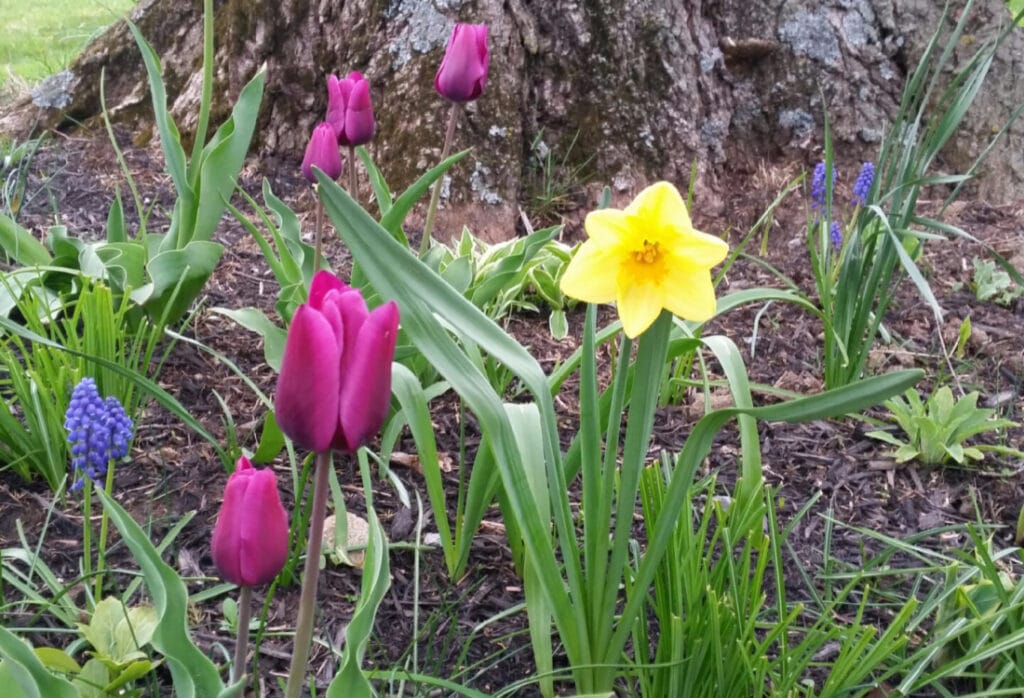
It is officially spring when every windowsill facing the south and the east are full of a hodgepodge of recycled containers that are filled with seeds. These seeds represent a sort of dream of what is to come. Literally, by faith, we pray over them, water them, watch over them, and wait for them to sprout and become seedlings. The seeds create such a feeling of anticipation for the coming garden; the wonderful meals to be made, the fresh herbs to be plucked, the bouquets to be created, and the pots and pots of perennials to be planted out into our flower beds.

starting seeds in the spring life full and frugal

My Long History with Seeds

We did not grow up starting seeds in the house. It was all new for me when I got a job at our local plant nursery. The first task I was given was to get seedlings out of the seed house. It was a warm, damp place of soft green. The seed house was filled with all kinds of seeds placed in special trays that were filled with tiny tags with latin names and common names of soon-to-be plants. All of the seedlings had to be gently misted, as they became varying degrees of gentle shades of chartreuse. Each tiny plant would eventually put on a set of leaves unique to that particular plant. I became very proficient in knowing what was what, just by taking a look at them.
 
seed starting life full and frugal
 
After learning to start seeds, I was sent out to one of the larger greenhouses with the special seedling trays to prick out seedlings, and transplant them into four and six pack cell trays. The tools for my job were a potting bench, soil, a pencil, and a watering can.The greenhouse I worked in was dedicated to peppers and tomatoes. We grew a wide variety of each; from the latest hybrids, to the good ol stand-bys, to several heirloom varieties. 
 
Before the first month of my job was over, I was sitting in a sea of green tomato and pepper plants. You could smell the plants before you walked in the greenhouse. I grew to love the scent of them, and I marvelled at how those tiny seeds could grow so quickly. It was fascinating to learn about all the varieties, and how some had been around for hundreds of years. It made me want to learn more. 
 
how to start seeds life full and frugal

Share Your Knowledge

I took the knowledge I gained from the greenhouse home with me. Sending away for every free seed catalog I could get, I would devour the catalogs from cover to cover. I would make lists of flowers, herbs, and vegetable seeds, and then I would dream of what the garden would be like. You can learn so much from those catalogs. For example, the differences between open pollinated seeds, hybrid seeds, and those scary things called GMOs. I wanted nothing to do with GMOs, and I warned my family about them. 
 
After being so inspired by seeds, my dad helped me build a small greenhouse from scrap lumber. I bought seeds, and started them in the house. I transplanted them in the greenhouse in old spent seed trays that they were going to throw away at the nursery. We ran plants in and out of the back porch to the greenhouse on warm days and nights, and brought them in on nights that were cold. 
 

We Were Made for a Garden

My Dad was really proud of me and helped me in the greenhouse with the plants. He told me I would have this knowledge of seeds, plants, cuttings, and gardens forever. Dad told me I’d take it wherever I went, and that I could pass it on. He was so right! Gardening returns us to our roots. We were meant to tend seeds, save them, grow them, pass them on, because we were meant for a garden.
 

Supplies You Will Need

So let’s get started! Here are a list of things you will need for this project. Remember- use what you have, and recycle what you can! Many of these supplies can be sourced at the Dollar Tree or Dollar General. Many of the seeds we will be using were $.25 a pack from one of these dollar stores. Lowe’s or Walmart have more varieties of different kinds of seeds as well. You don’t have to spend much to get some beautiful plants this year! Click here for more tips and tricks on how to start seeds at home.

how to start seeds at home life full and frugal

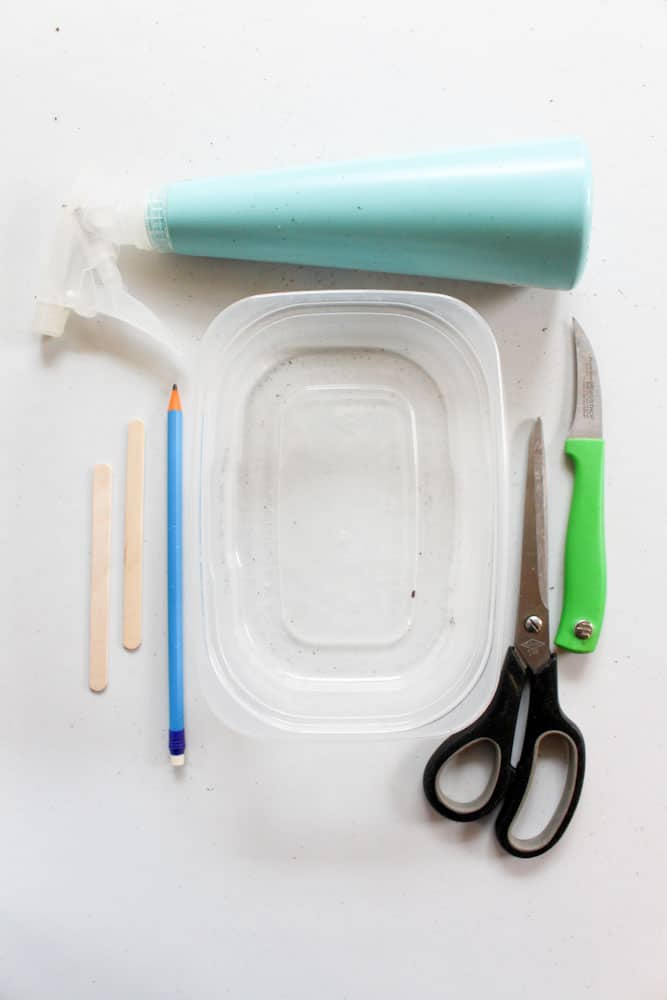
Recycled plastic containers, like sour cream tubs or lunch meat packaging

Recycled cardboard, like tissue boxes or sparkling water boxes 

Scissors

Seed starting potting soil

Seeds (pay close attention to directions on the back of the seed pack)

Crafting sticks (like popsicle sticks)

A thin point Sharpie

A misting spray bottle of water

A pencil

How to Start Seeds

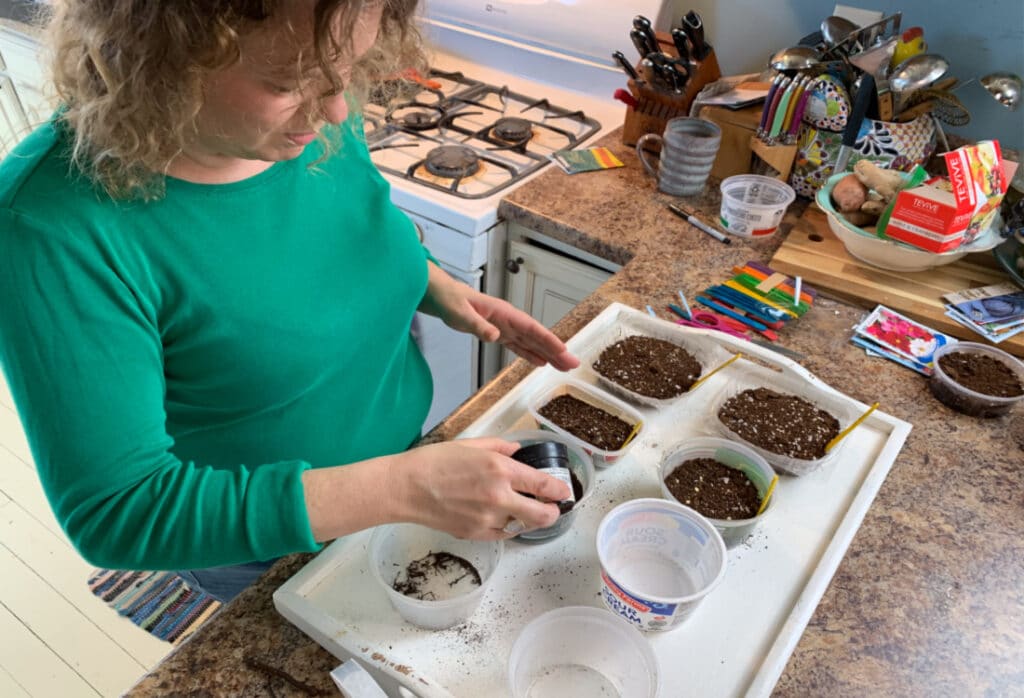
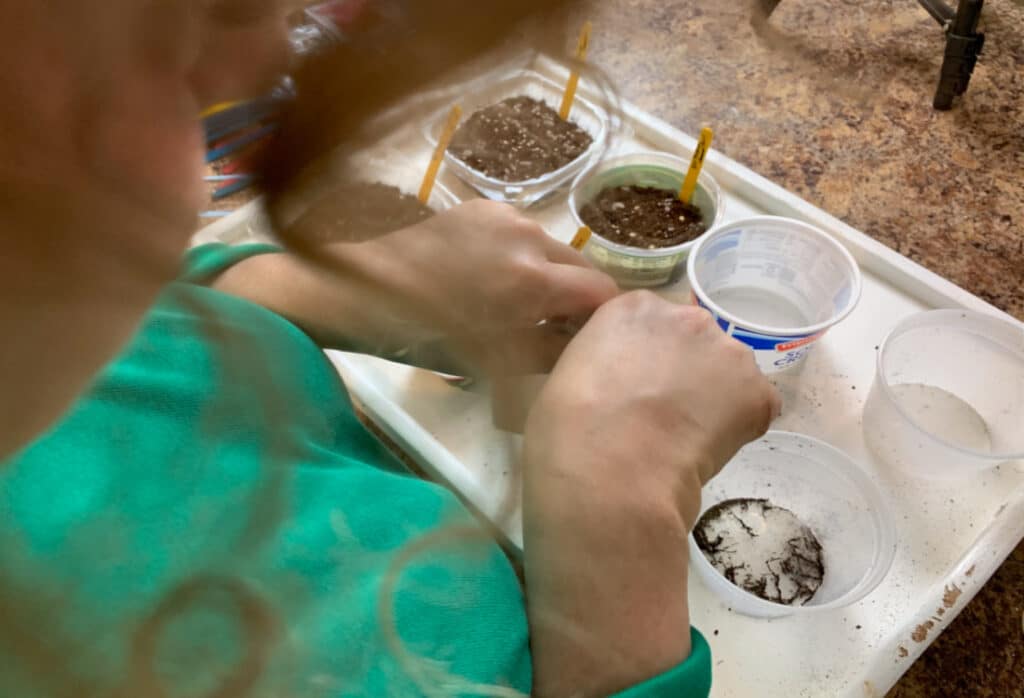
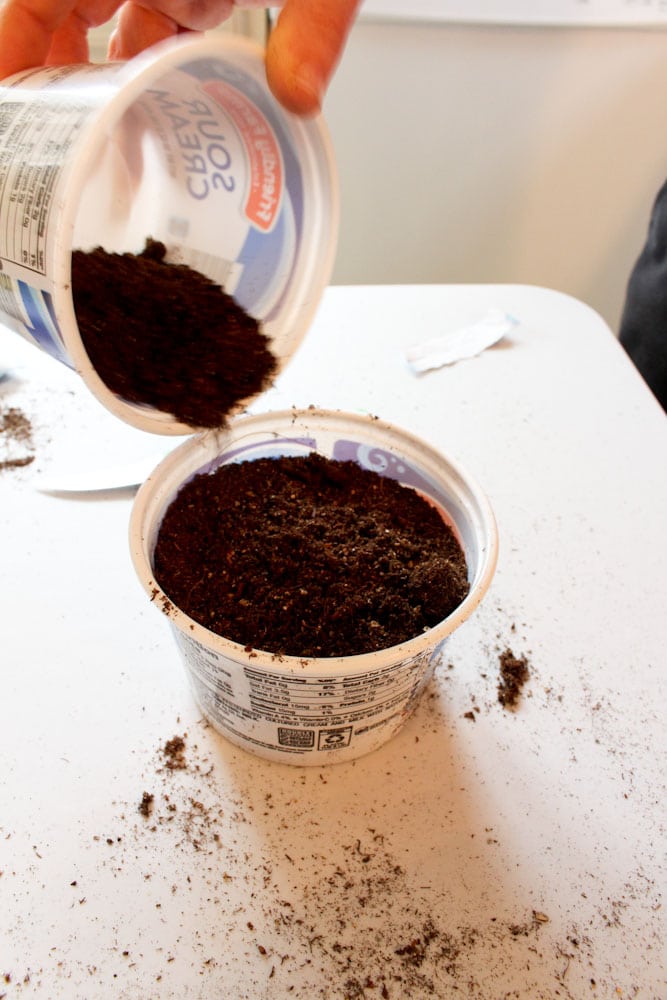
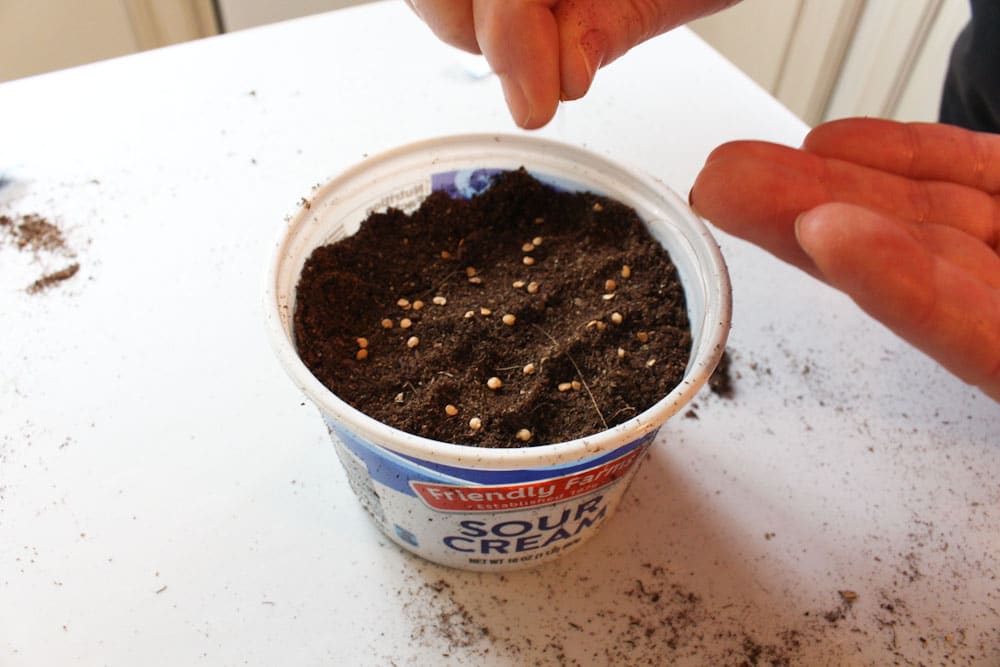
In your recycled plastic container, add some seed starting soil. Level the soil out. After that, gently sprinkle some seeds onto the soil. Try not to get them too bunched together, but if you do, use the pencil to separate the seeds as needed. Next, sprinkle some more seed starting soil to the top of the seeds- maybe about 1/4 inch. Basically you need enough to cover the seeds, but you don’t want it to be a really thick layer.

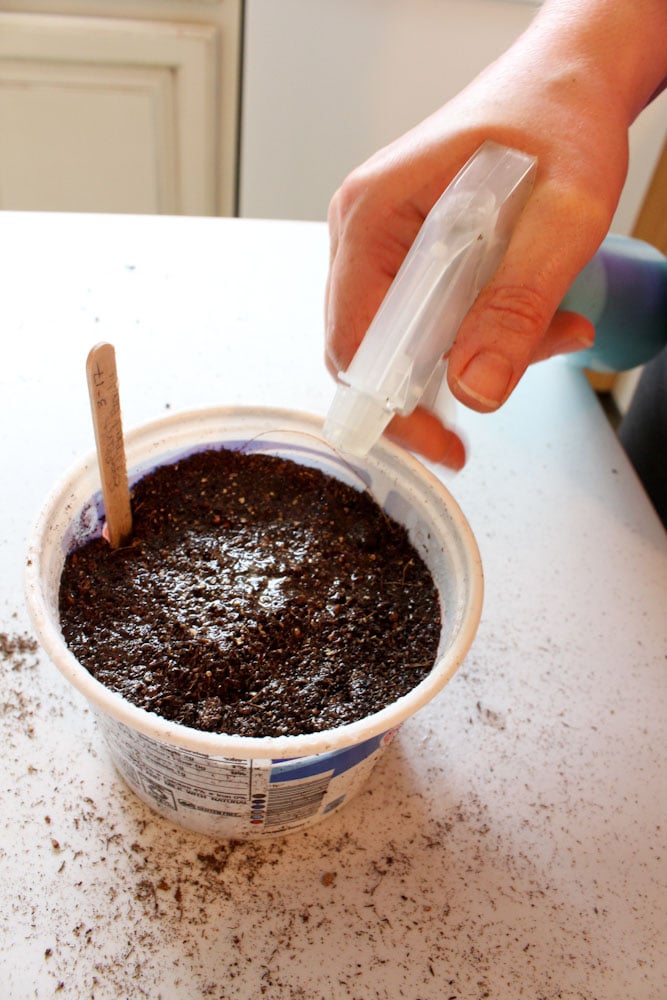
Next up, take your spray bottle on the misting setting, and give the container a good misting of water. Using your crafting sticks and a Sharpie, label the container with the kind of plant, and the date you started the seeds. Finally, place the container in a bright place, like a South-facing window. You will need to mist the seeds twice a day, or more, to make sure they do not get dry. If your house is really dry or warm, you may need to mist them more.

starting seeds at home life full and frugal

start your own seeds at home life full and frugal

starting garden seeds at home life full and frugal

Within 7 to 10 days, you should start seeing some seedlings popping through (depending on germination time). Within a month, you will be ready to transplant seedlings into their own individual cell packs. Click here to learn how to transplant seedlings later this spring.

For more wonderful ideas on plant propagation, check out Charles Dowding.


0 Comments

Submit a Comment

Your email address will not be published. Required fields are marked *

Pin It on Pinterest

Shares
Share This

Share This

Share this post with your friends!