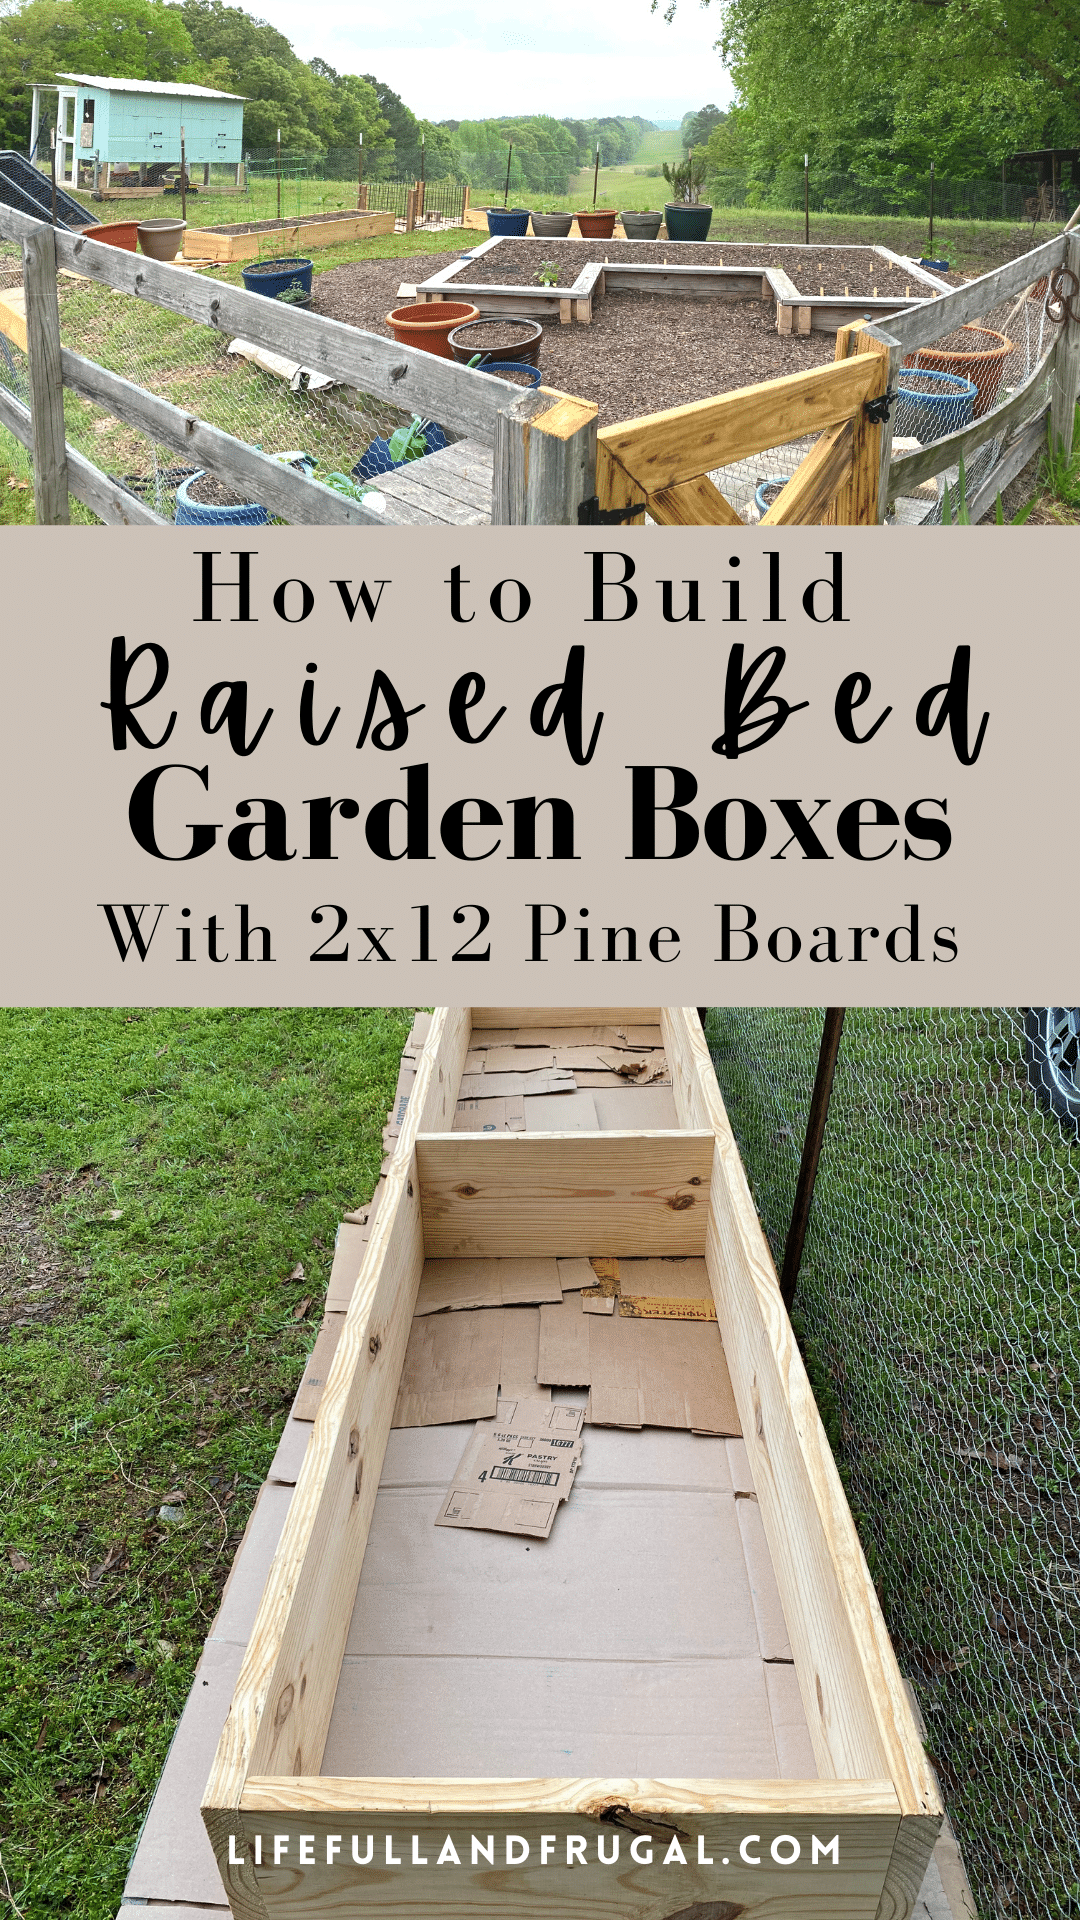
Spring has sprung and I have been busy building these DIY raised bed garden boxes using untreated 2×12 pine boards! There has never been a better time to consider creating a garden and growing your own veggies. Check out this simple tutorial to create your own raised bed garden boxes. Even if you are a gardening newbie like me, I hope you will be inspired to give it a try this spring!
This post contains affiliate links. As an Amazon Associate we earn from qualifying purchases. When you click on our affiliate links and make any purchase, we may make a small commission at no extra cost to you. To read our full affiliate disclosure click here.
Why Build Raised Bed Garden Boxes When You Can Just Buy a Kit?
Obviously, there is absolutely nothing wrong with purchasing a raised bed garden kit. There are so many nice ones available online or at big box stores.
However, there are a couple of good reasons to build your own raised bed garden boxes instead of buying them.
You Can Customize DIY Garden Boxes to Fit Your Exact Needs.
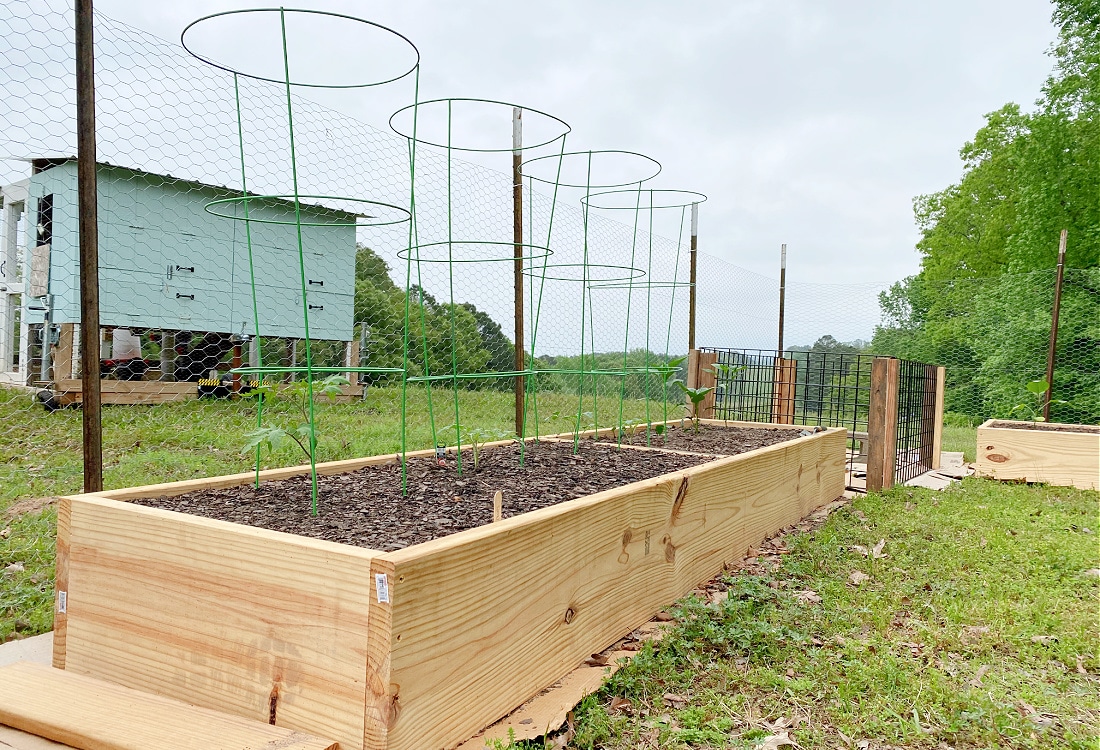
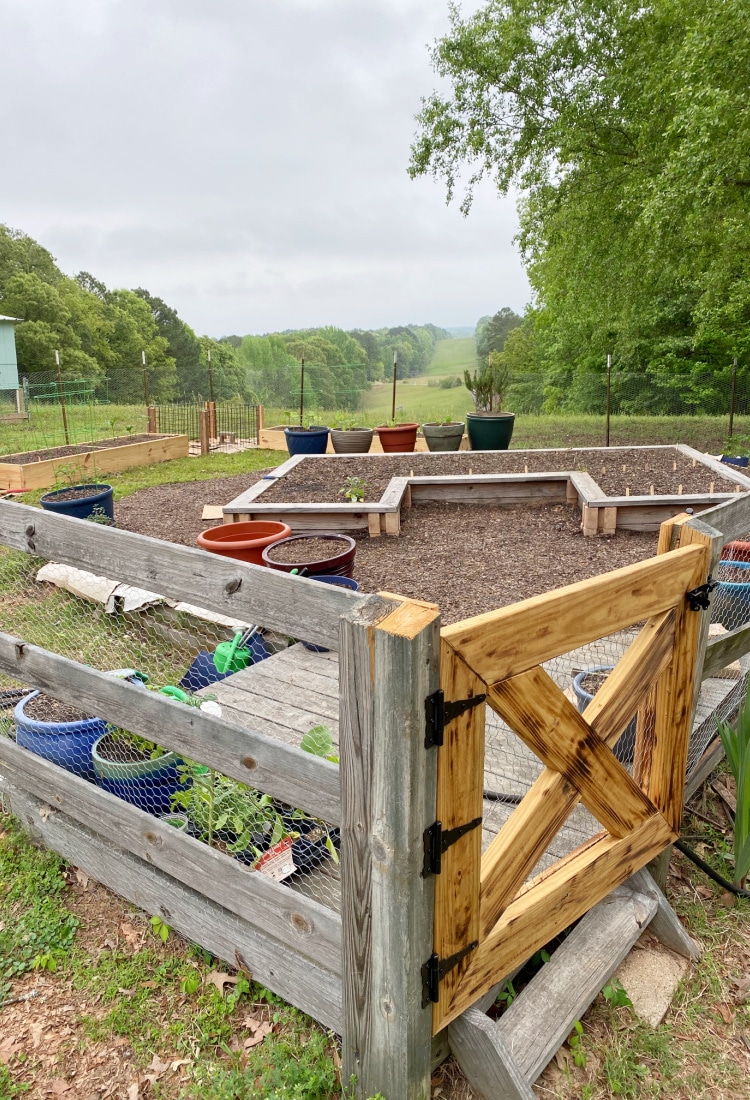
We fenced off a corner of our pasture to create our garden. Then I measured the space that we had to work with, in order to determine the size of our garden boxes. To give plenty of clearance around the perimeter, I chose to make the boxes a little more shallow. However, we had plenty of space to make them longer. Ultimately, we went with two raised bed garden boxes measuring 2 feet by 10 feet.
So, as you can see, building your own DIY raised bed garden boxes just gives you the option to maximize the space you have available to you.
You Can Choose the Quality of Materials.
Most of the time a raised bed garden kit will come with super cheap, low quality hardware. We purchased a kit before, only to have the screws stripped out immediately because they were so cheaply made. Also, the boards that come in those kits tend to be thin and flimsy. Building your own allows you to choose the quality of materials. This way you know you are getting all the value out of the time and money you invest in creating your raised bed garden.
What Materials to Use for DIY Raised Bed Garden Boxes:
The possibilities are endless when it comes to which materials you can choose to build your own raised bed garden boxes. Here are just a few ideas:
- Reclaimed Lumber or Leftovers from Remodels
- Corrugated Metal
- Tree Limbs
- Landscaping Bricks
- Cinder Blocks
- Recycled Tires
- Wood Pallets

Why We Chose Un-Treated 2×12 Pine Boards:
We ended up purchasing un-treated 2×12 pine boards to build our garden boxes for a few reasons.
- Strength – These are really hefty boards which will make for really strong boxes.
- Fewer Cuts – Instead of stacking smaller boards, I thought it would be easier to buy big, beefy boards in the size I needed, and keep the design really simple. Originally, I wanted to buy five 2x12x10 pine boards for this project. That way the sides would be the correct length. This meant that I would only have to cut the 2 foot end caps out of the fifth board.
However, our Lowe’s only had 2x12x12 pine boards in stock.
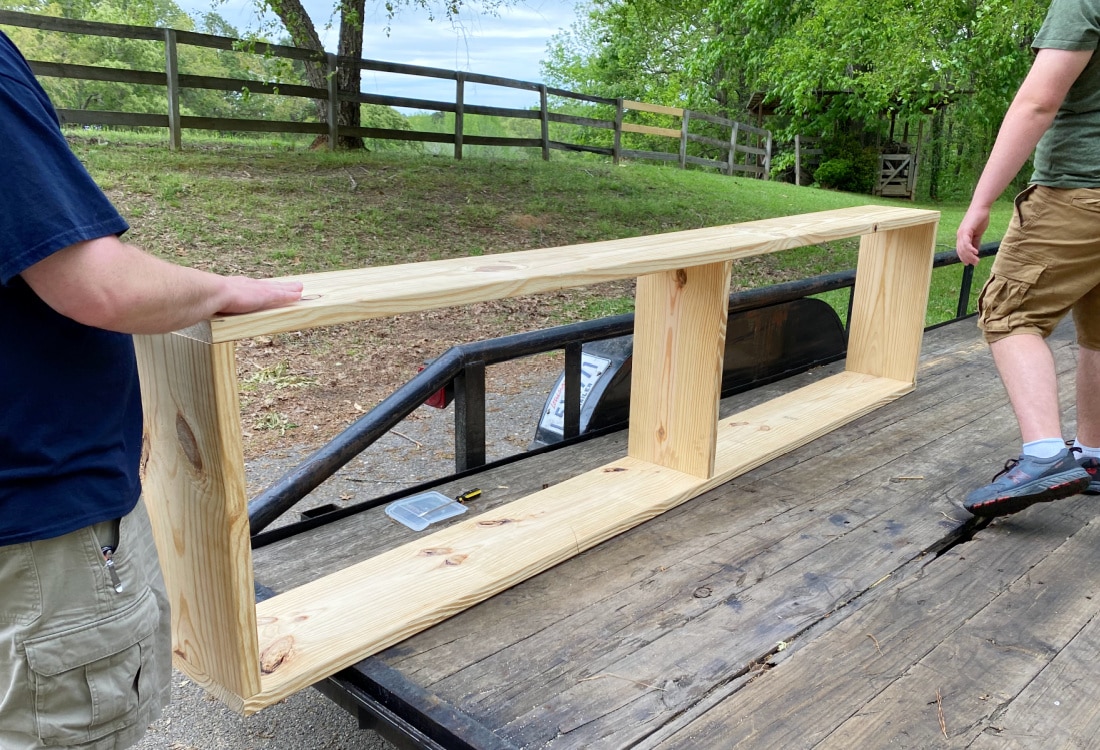
Not to be discouraged, I cut 2 feet off of each board for the end caps, plus 2 additional 2-foot sections for reenforcement in the middle. Since the beds were 10 feet long, we felt like they needed braces in the middle to prevent them from bowing under the weight of the soil.
- Garden Box Depth – Apparently, plants only need 6 inches of soil to grow. But I wanted our beds to be at least 12 inches high to TRY to keep our crazy Bermuda grass from growing up the sides.
Of course, you can build your boxes taller, but that will cost you more money and effort. However, if you want to avoid bending over or squatting when it comes time to pull the weeds, it might be worth it.
Using Un-Treated Pine Boards Vs. Treated for DIY Raised Bed Garden Boxes:
I wanted to use un-treated lumber for our garden boxes because we really try to avoid toxins when we can. I don’t want those chemicals leaching into the soil that’s nourishing plants we are going to eat!
There are disadvantages to using untreated boards. They will of course rot sooner than treated boards will, but even untreated boards will last up to 5 years. I’m hoping since we used 2x12s, they will last longer than that since they are so massive. I found a really interesting blog discussing the pro’s and con’s of using untreated pine boards in the garden. You can check that out here.
How to Build Raised Bed Garden Boxes with Un-Treated 2×12 Pine Boards:
Materials Needed:
- 2×12 Pine Boards (whatever length works for your space)
- Cordless Circular Saw
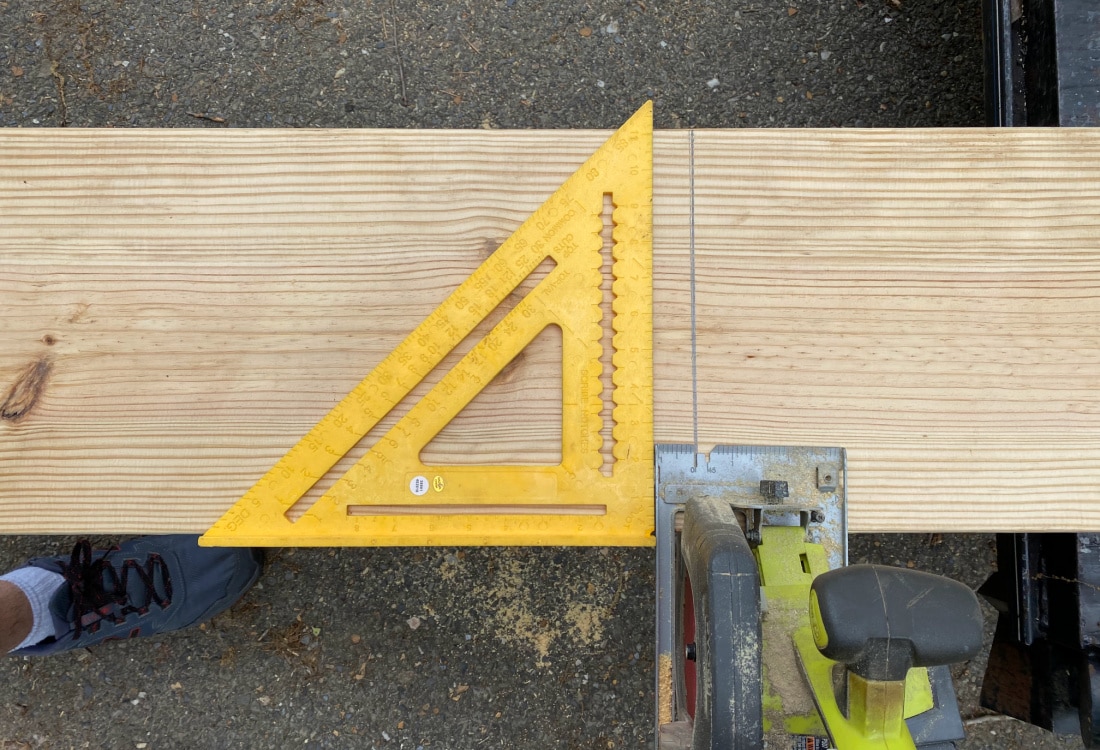
- Speed Square
- Measuring Tape
- Cordless Impact Drill
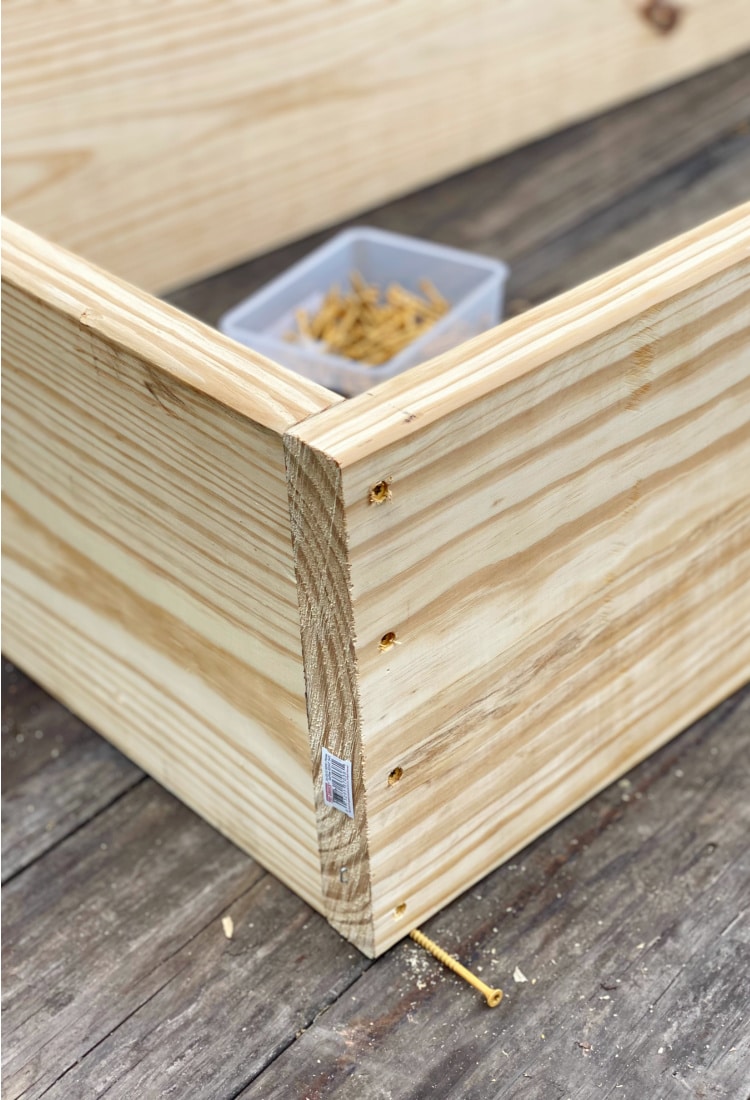
- 3-inch Wood Screws
Note: I buy tools for my husband for every birthday, Christmas, anniversary, and Father’s Day. It’s a great way to slowly build up tools. However, this Ryobi Combo Kit which includes a circular saw, 2 batteries, a charger, and an impact driver (drill) is a really good deal. I highly recommend!
Directions:
1.) Determine the size you want, and cut your boards to length.
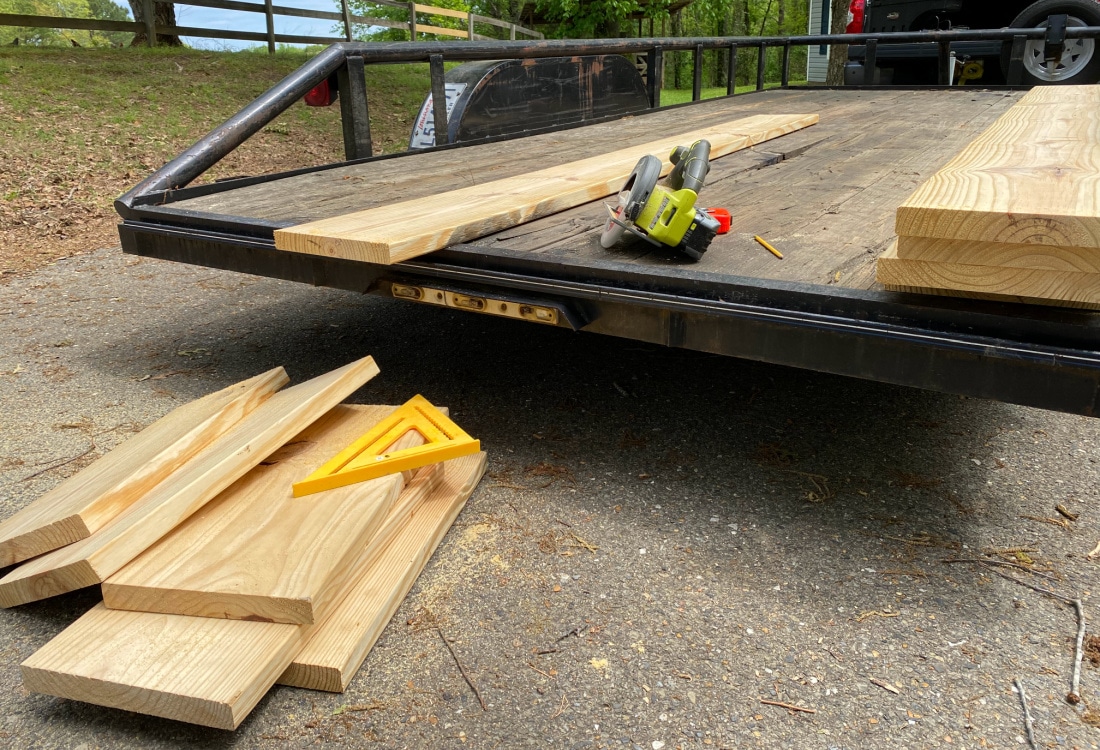
2.) Make sure your cuts are straight so that the corners of your boxes will be square and fit together neatly. You can use a speed square to mark the line that you need to cut, then use it as a guide for your saw. This will ensure a really nice, straight, square cut.
3.) Sandwich the end cap board between the longer side boards to ensure that you get the maximum amount of square footage. Secure the sides with screws.
4.) If you have longer boxes like ours, add a center support to prevent the boards from bowing under the weight of the dirt.
5.) Place layers of cardboard on the spot where you intend to place your boxes. Make sure all the grass is covered well, then position the boxes over the cardboard. This is an important step that will keep the weeds and grass from taking over your raised bed garden.

Life Full and Frugal Raised Bed Garden Tips:
How to Fill Garden Boxes Affordably? Now that you are ready to fill your raised bed garden boxes with dirt, consider filling them halfway with dried up leaves, sticks and twigs. This way you won’t have to spend so much money on soil.
Where to Buy Soil? We purchased a mixture of soil and mulch from a local plant nursery. It was much cheaper and easier to deal with than bags of soil from the store.
Need Natural Fertilizer for Your Garden? We amended our soil with compost and well aged manure from the chicken coop! You can’t get a cheaper, more natural fertilizer than that!
Where to Find Cardboard for the Garden? I went to my local Dollar General to get cardboard. They had the boxes all broken down and ready to use. It worked perfectly AND it was FREE! There is power in asking nicely, so hopefully you can score some free cardboard for your garden as well!
Feeling Inspired? Pin It For Later!
Very informative and simple to read.
Thank you, Bryon! We’re so glad you found it informative and easy to read! =)