Hey friends! Today I thought I would take y’all on a before kitchen reno tour! After nearly ten years of planning, dreaming, and saving, we are renovating our kitchen. But before we break out the sledge hammers and crowbars for demo day, I thought I would let y’all see where we are starting, so you can follow along in the transformation!
Repeat Renovators
I love watching people progress through their home renovations and seeing the blood sweat and tears that produce a beautiful transformation. It’s kind of a metaphor for life, isn’t it? If you are a long time follower of Life Full and Frugal, you might remember me mentioning that my husband and I have gone through a couple of renovations now. We moved into our current home in 2011. My husband and I typically live by a 5-year-plan, and we have done so throughout our 20+ years together. When we moved, our goal was to pay on the house for several years, then make it our own by renovating.
Our first renovation was in 2014. We painted–basically everything–removed the popcorn from the ceilings, and installed new flooring. We had so much on our plates during that renovation, it just was not possible to completely make over our kitchen. But a little bit of lipstick and rouge go a long way to freshen up a space. During that renovation, we also re-oriented the island in our kitchen. That was a total game changer! My kitchen functioned SO much better, and ultimately, that is the most important thing!
Our second renovation was NOT in the 5-year-plan, but a tree fell on our house, and our plans changed. As a result, my kitchen reno took a bit of a detour. So much of living frugally is about waiting, and not biting off more than you can chew. (Or pay for…) In spite of it all, that second (unplanned) renovation ended up being such a blessing! We doubled our classroom space and added a laundry room. I love that space so much!
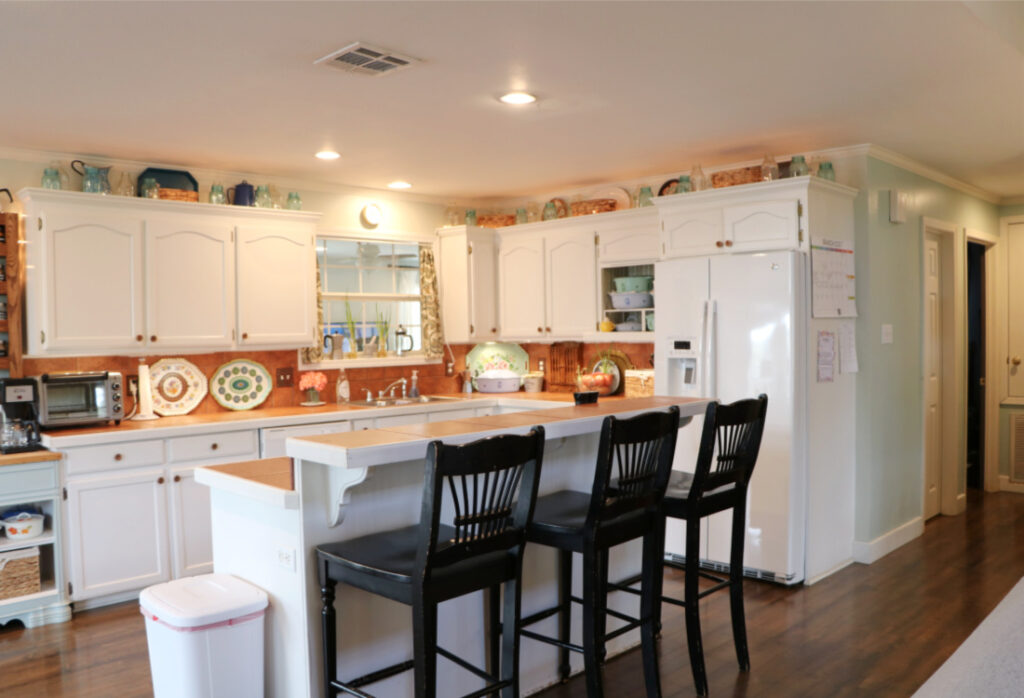
Before Kitchen Reno Tour
My current kitchen has served us really well over the years, and I am so very grateful for it! But, there are a few things that I am really looking forward to in the new kitchen! As I show y’all around in this before kitchen reno tour, I’ll let you in on some of our plans for the new design!
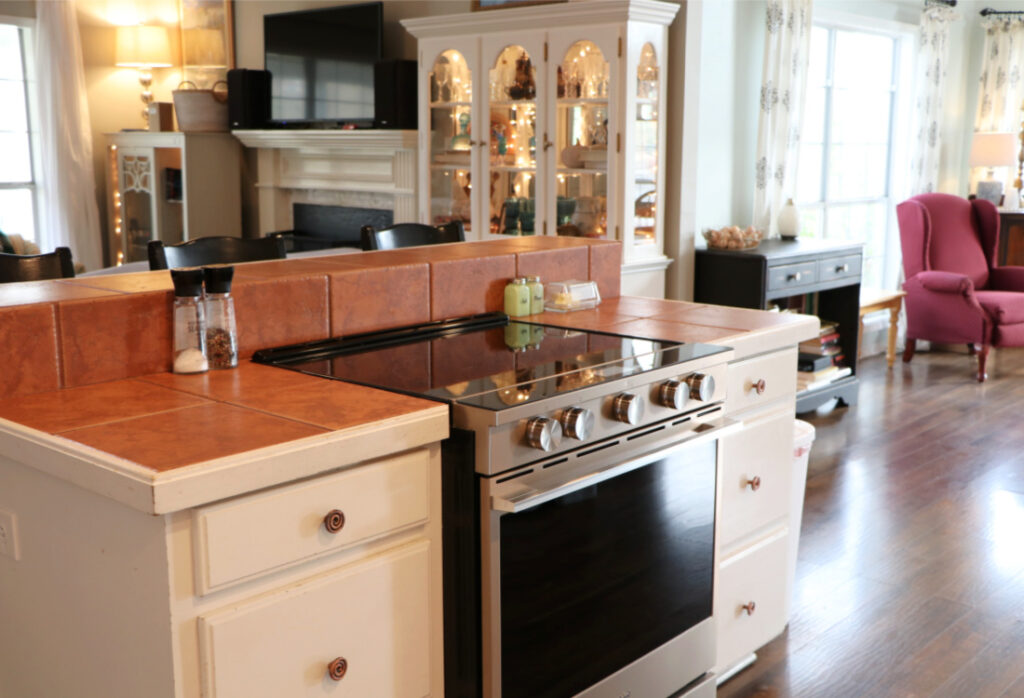
Saying Goodbye to my Electric Stove, and Hello to a Gas Stove and (Finally!) a Vent Hood!
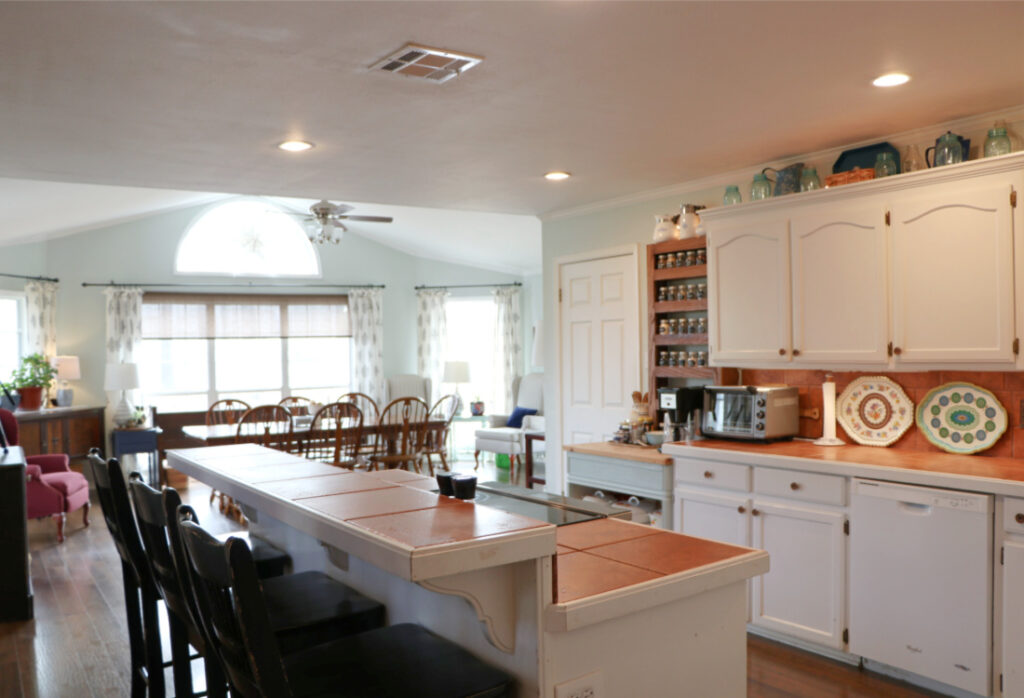
In our current kitchen, we have an electric stove. It resides in our kitchen island. We do not have a vent hood. This is something that I am REALLY excited about changing. I cook a lot, and there are many times when we have to open up all the windows to vent out the house. Since we live in Louisiana, that’s not always ideal, to say the least! So, the plan is to remove the stove from the island and place it on the north facing wall in the perimeter cabinets. This will allow us to install a vent hood and drop a gas line for a new gas stove.
I grew up cooking on a gas stove, and I also had one at our little house on Davis Lane. We lived there for 11 years. When we moved to this house, I basically had to re-learn how to cook on an electric stove. I am really excited about switching to a professional gas stove. It is definitely an investment and a big chunk of our budget is going toward this stove. But, since we have lived in this house, we have gone through at least three different electric stoves. As you can imagine, that adds up!
While shopping for a new stove for this kitchen remodel, I was so frustrated by the fact that everything I looked at was digital and came with WIFI. Y’all…I just can’t imagine why anyone needs WIFI on their appliances. The problem is, when those digital interfaces go south, you will pay about as much as it cost for the entire stove to replace them! My goal is to buy a really quality piece of equipment that will stand the test of time. As Starla shared, sometimes you makes sacrifices to invest in good tools for your kitchen. You just have to decide what your priorities are, and where you want to save money, and where you want to invest.
The Island of my Dreams and Quartz Countertops!
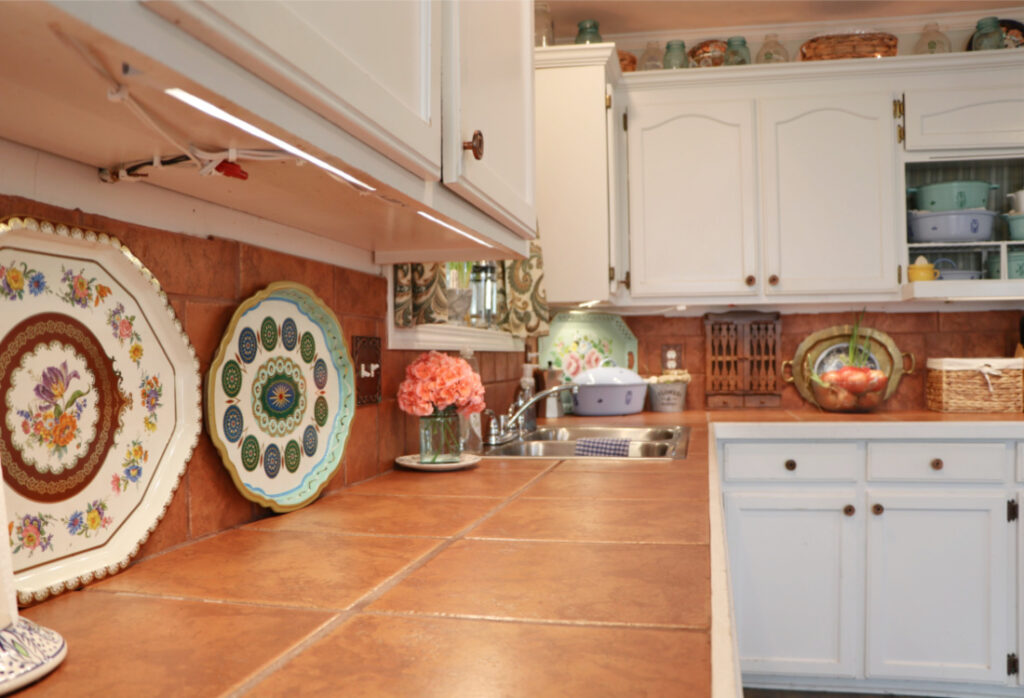
By removing the stove from my kitchen island, we will be able to have a really large, open work space! I am a messy cook. In our current kitchen, I basically have 4 little square feet of work space on either side of my stove. As you can imagine, this is really frustrating. Also, our countertops are made up of 12×12 terra cotta tiles. Let me just say, those things are absolutely indestructible! You can beat the mess out of them, cut on them, place scalding hot pans on them, and they are just fine. It’s also a really affordable way to install countertops, and a very approachable DIY project.
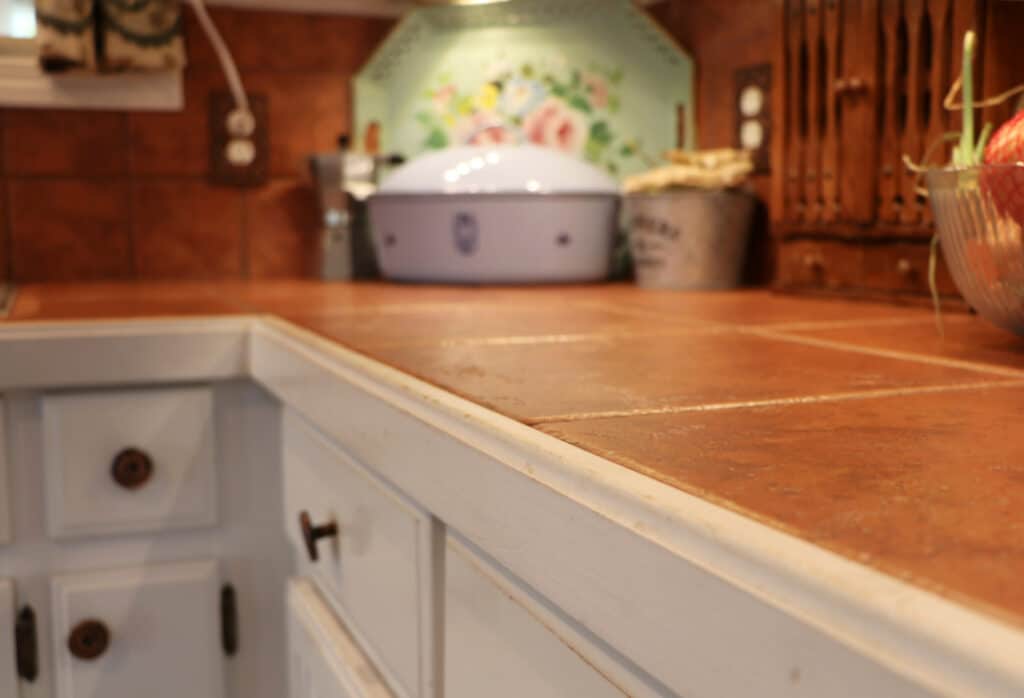
However, keeping them clean is almost impossible. No matter how much I scrub those suckers on a daily basis, there is no telling what mess is living in those grout lines! The terra cotta tends to suck all the light out of my kitchen and makes everything look red! They also make it really difficult to do much baking in my kitchen. I usually just go to our dining room table to roll out pie crusts or knead dough. So, I am really looking forward to the clean, open surface of quartz countertops!
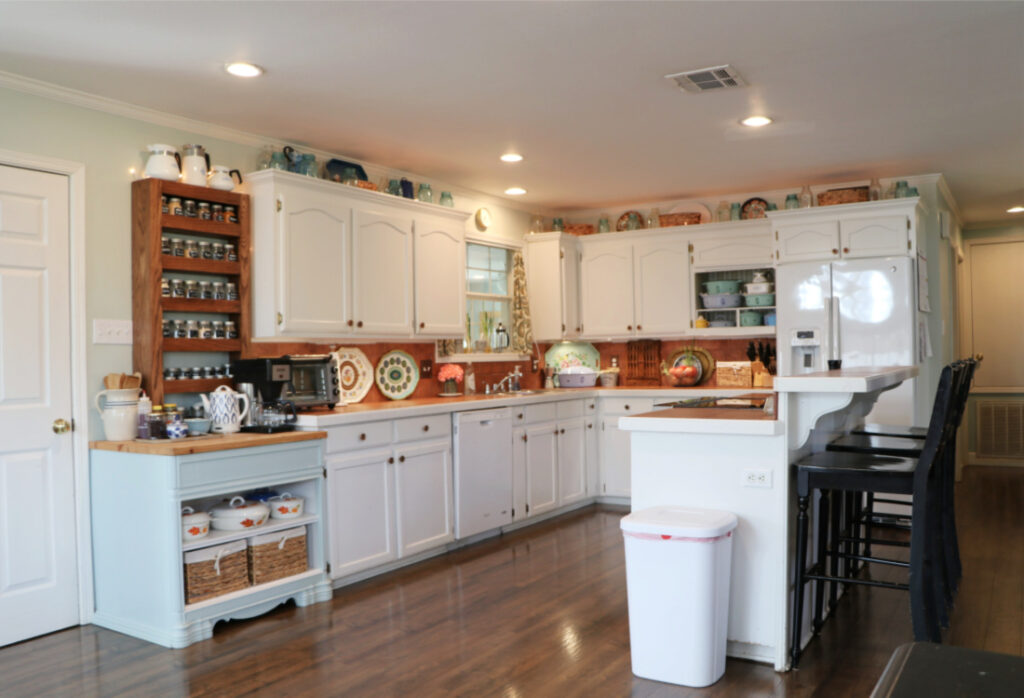
Let There Be Light! And a Wood Planked Ceiling!
In this before kitchen reno tour, you will notice our kitchen lighting needs a good bit of work. When we moved in, there were two florescent lights. We took those out and replaced them with recessed lighting, adding two additional lights. This improved the situation, but it was always meant to be a temporary fix. In the new kitchen design, we will remove the current ceiling and wire in all new lighting. Lighting is essential in work spaces and since I am a blogger, it’s even more important! This is going to make shooting photos and video so much nicer!
We are also planning on installing a wood planked ceiling. There are a couple of reasons for this design choice. First and foremost, it’s something that we can do ourselves. Sometimes when doing a renovation, you just have to be aware of your limitations. We can NOT do drywall ourselves! So, instead of hiring someone to do the work, we are taking on this project ourselves. The second reason is that I feel like it will add a lot of character and architectural interest to our kitchen. My goal is always to add timeless charm and a lived-in feeling to our home built in the mid 90’s. Just like we did in our boys’ bathroom!
Continuing our Before Kitchen Reno Tour and Talking About Cabinetry!
Obviously, this kitchen reno is a complete over hall, because we are also getting new cabinetry. In our current kitchen, I really embraced the space above our cabinets. I added thrifted items from flea markets and antique stores to add color and an eclectic feel. I also tried to help out our sad lighting situation and eliminate some shadows by placing Christmas lights on top of our cabinets. They look so pretty reflecting off of my collection of blue vintage mason jars! Adding collected items that you love is a simple and frugal way to enhance the look of your kitchen when you don’t have the budget to completely remodel.
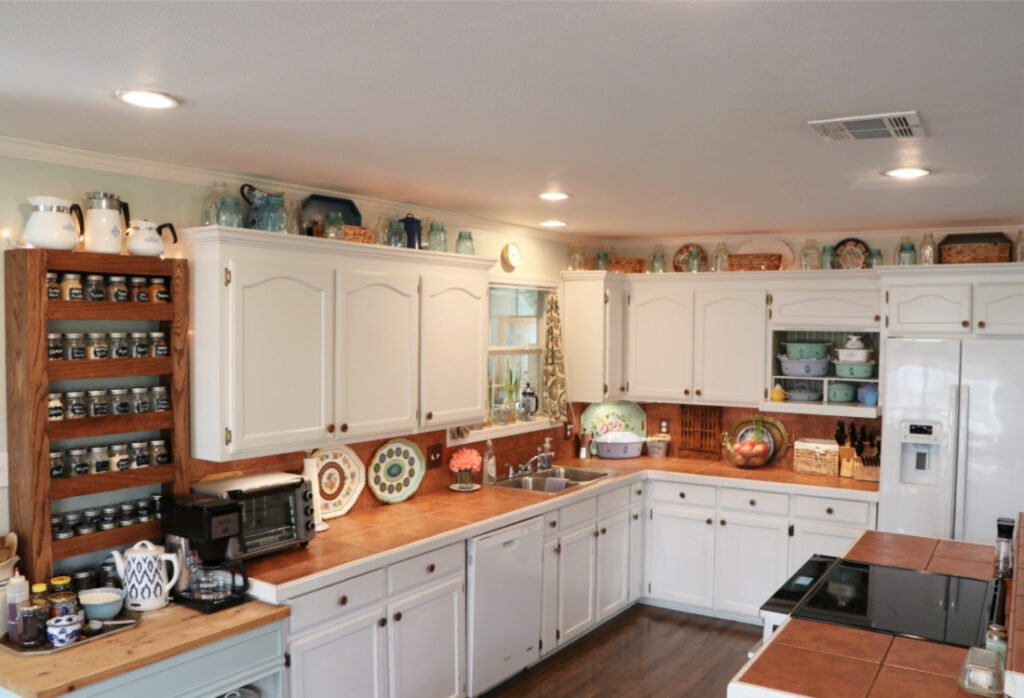
So the plan for the new cabinets is to have them go up to the ceiling. I’m hoping this will draw your eye up, making the ceiling height appear taller. Our house has an open floor plan. The kitchen is open to the dining room on one side, and the living room on the other. Both of those rooms have vaulted ceilings and it makes the 8-foot kitchen ceiling feel really low. The hope is that, by improving the lighting, adding the bright white wood planked ceiling, and taking the cabinetry to the ceiling height, it will help our kitchen to feel taller and more open.
Finishing Touches: Paint Colors, Backsplash, and Hardware
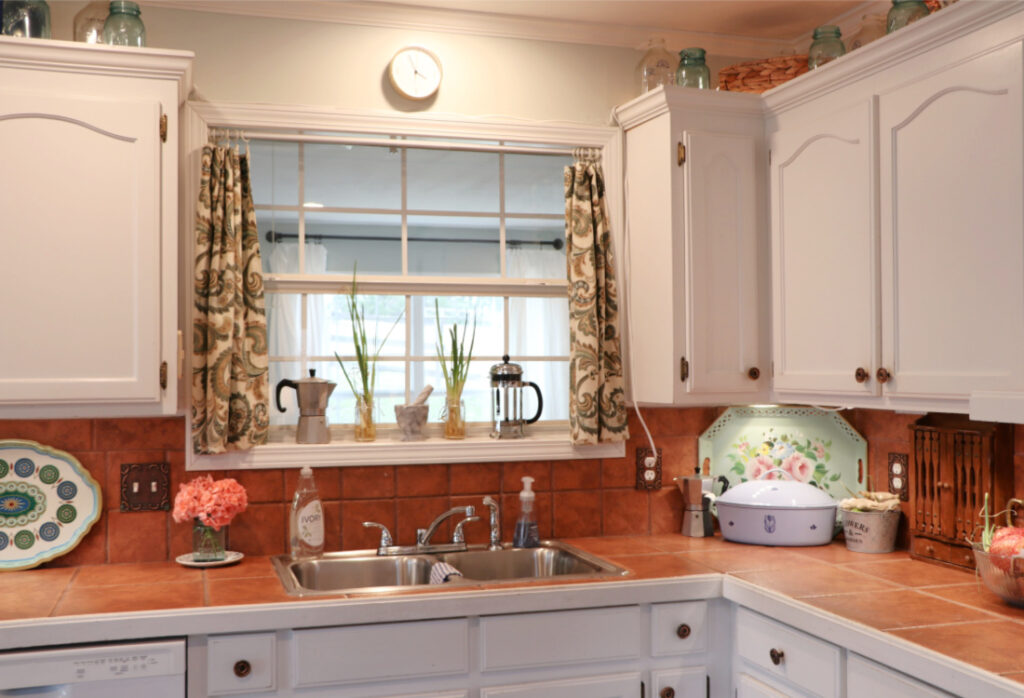
This kitchen has a stainless steel, double sided sink. In the new kitchen, we will be opting for a cast-iron enameled apron sink. The backsplash will be the same hexagon shaped marble mosaic tiles that surround our fireplace. I haven’t chosen door knobs and drawer pulls yet, and I’m still shopping around for a faucet. Since our house is so open, paint colors will take their cues from the surrounding rooms. The perimeter cabinets will remain a crisp clean white, with a splash of color on the island. It will probably be a pale green or a soft blue. Those are my favorite colors!
So, that’s it for my before kitchen reno tour and our plans for the new kitchen design! I hope y’all will join us for this transformation. It’s gonna be a LOT of work, but it will be a lot of fun as well. If you have any advice or wisdom from your own kitchen renovation, please share that with us in the comments! I appreciate any guidance y’all have for me! God bless! ~Shanna
***Shanna’s Kitchen Remodel Update***
After nine months, our kitchen is FINALLY DONE!!!! Come check out our European Cottage Inspired Kitchen Reveal!!!! We are so happy with the results! And if you would like to see the ENTIRE PROCESS of renovating, check out my vlog, “Shanna’s Kitchen Renovation Diaries” on our YouTube Channel! While you’re there, don’t forget to SUBSCRIBE! I hope y’all enjoy the kitchen tour! ~Shanna
Pin it for later!

Looking forward to going through the renovation with you Shana! Love You!
Thank you so much, Kathy! I’m really excited! Love you, sweet friend! <3
We had tile countertops in Panama and I was always afraid of cracking dishes on them. So glad you get to update and redo it so it’s a joy to work in!
Absolutely! It’s like a dream come true! A very long time coming. I can’t wait!:)