Decorating on the Cheap: Mid-Century Modern Mirror
I am always telling my boys what I want to be when I grow up…which is hilarious because their response is always one of bewilderment. It’s so funny to watch their faces and their confused reply is always, “But you ARE all grown’ed up, mama!” haha!!
Future Occupation?
I have a myriad of future occupations reserved for whenever I reach that illusive state of being “all grown’ed up.” However, the one I tease my boys with the most is being a designer. I love to create. It fills my heart to the brim to work hard and give birth to something beautiful. I am especially fond of taking a bunch of nothing’s and turning them into something that will dazzle the eyes and inspire the imagination. Having a huge bank account affords you the luxury of buying whatever you want for your home…which is not a bad deal, I must say.
Beauty is for Everyone!
I’m glad there are people on this earth who are able to do so. But what about the rest of us? Beauty is for everyone! Look at how God showers us with majestic, breath-taking beauty in nature! If you are willing to think outside the box, use a little elbow grease and get your hands dirty, you too can add luxurious accents to your home on a humble budget.
If you are interested in more frugal tips to decorate on a budget, check out Starla’s blog How to Get What You Want or Need for Free and 18 Tips to Find the Best Stuff While Thrifting.
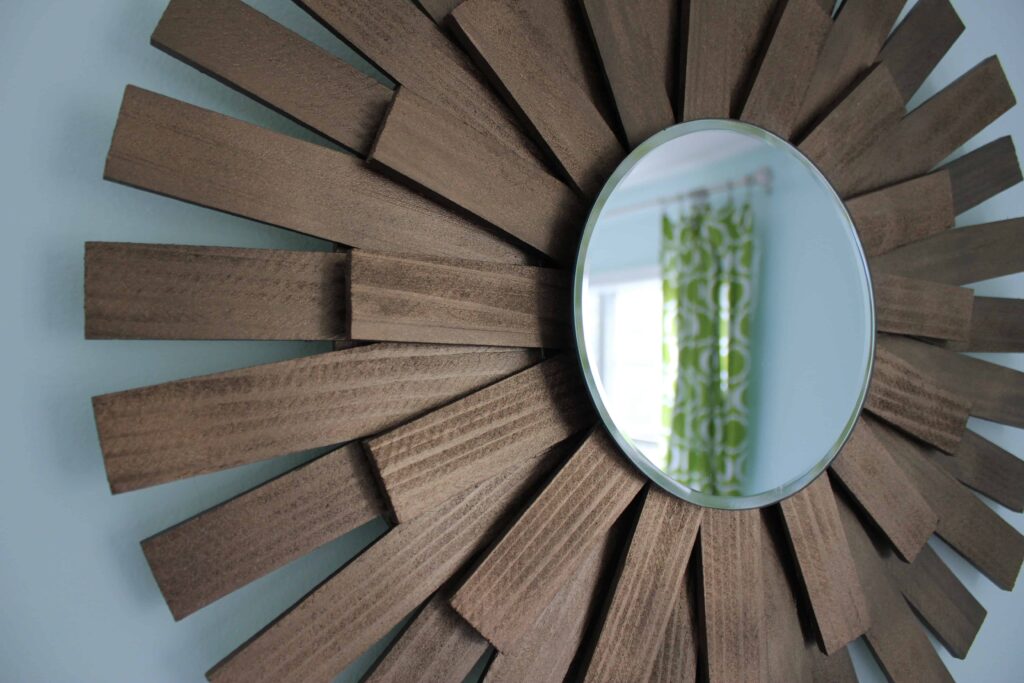
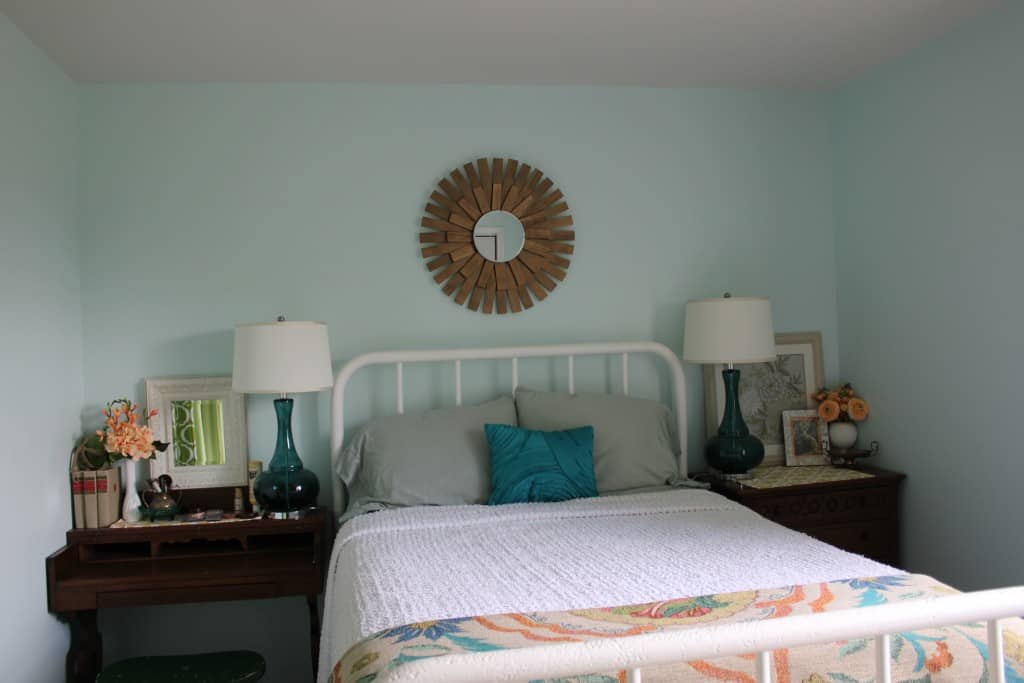
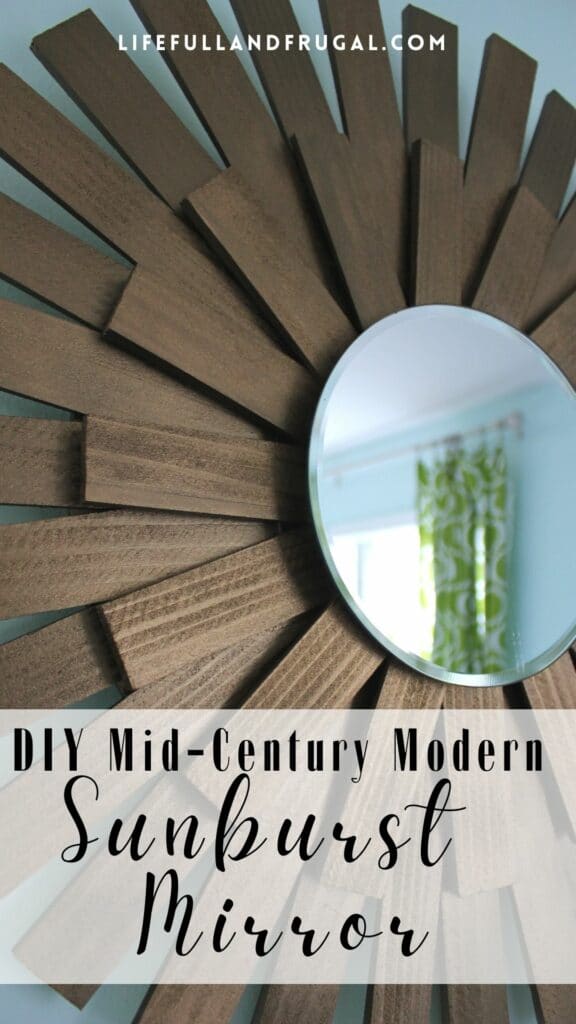
Mid-Century Modern Mirror
So, I’ve been in the market for a sunburst mirror for a while now. I needed something to fill the void above the bed in my guest room and I thought a mirror would be the perfect piece of jewelry for that space. There is a mirror in Hobby Lobby that I visit from time to time. It is really stunning, but it costs $200…yikes! I went to visit that same mirror last week and they had marked it down by 50%. Let me just say, I think that is a pretty good deal, but I still couldn’t justify that cost. Besides that, I really wanted to try making one for myself.
DIY Mid-Century Modern Sunburst Mirror: What Materials to Use?
While planning for this little DIY project, the hardest part was narrowing down what materials to use. I was really inspired by the wedge shapes of some mid-century modern style mirrors. That shape brought to mind wood shims. Wood shims are used to “plum” a window or a door during installation. That was my jumping off point and I knew I could transform these humble little objects into something special.
Materials I Purchased for my Mid-Century Modern Mirror:
- 24″x24″ Birch Board
- Bronze Spray Paint
- Mirror Mastic (this is a special kind of glue used for mirrors.)
- Wood Shims
- Beveled Candle Mirror
Materials I had on hand:
Step by Step Process to Make a DIY Sunburst Mid-Century Modern Mirror:
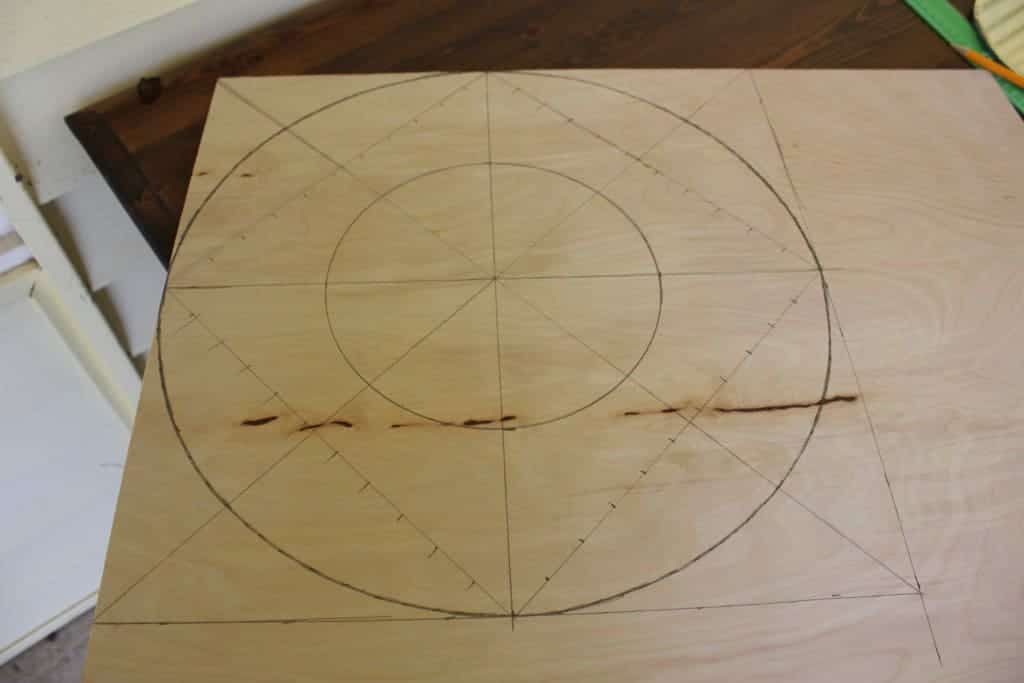
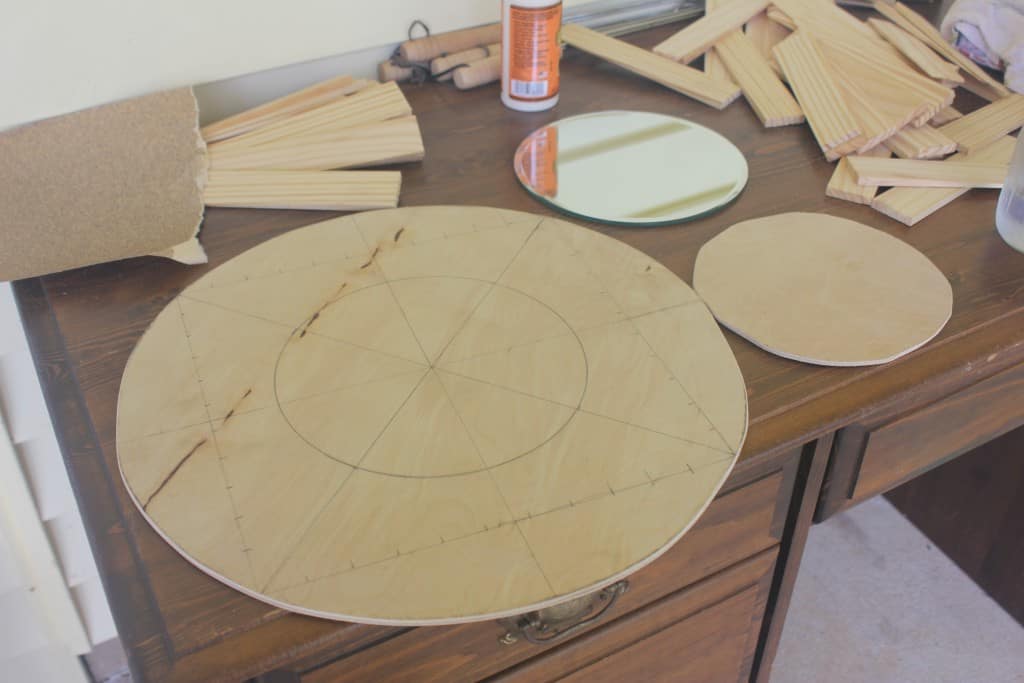
Step One: Draw a Circle on the Plywood for the Backer Board
First, I drew out my circles. The backer board for my mirror is 16 inches in diameter. This looks really complicated because it was. I’m not sure why I didn’t go about this in an easier way. But, in case you ever wondered when you would ever use that stuff from your high school geometry class, here you go. I also cut out an 8 inch circle, which I will explain later.
Step Two: Cut out Circles with a Reciprocating Saw & Sand the Edges with a Palm Sander
Here are my circles after I got them cut out. Using a reciprocating saw was both exhilarating and terrifying all at once. I’m quite proud of how well they turned out though! You will need to sand the edges to get rid of any rough spots.
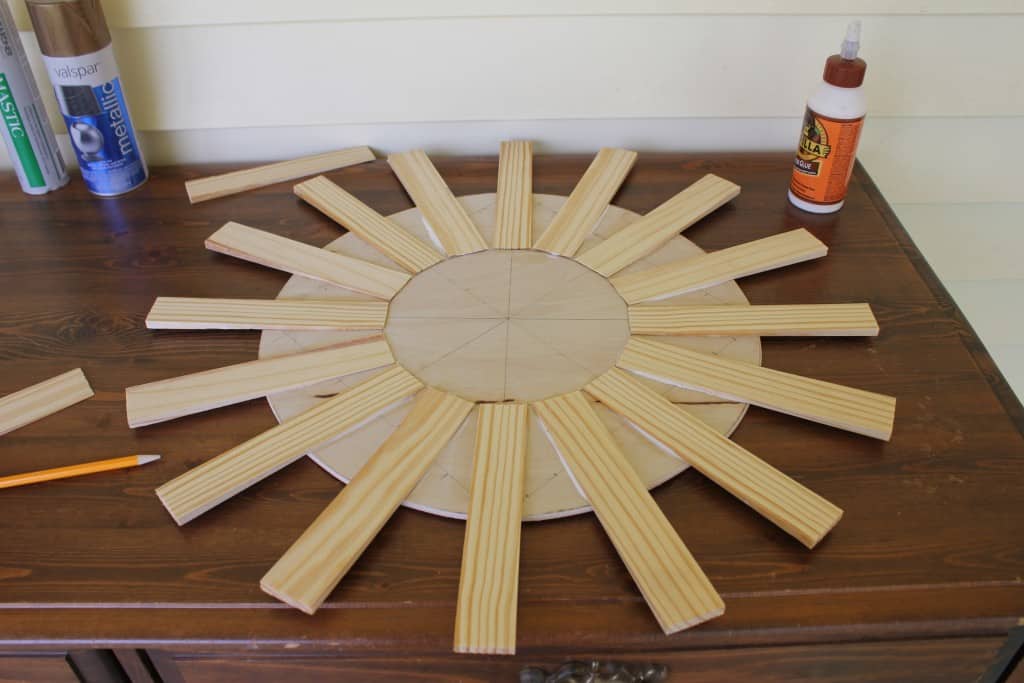
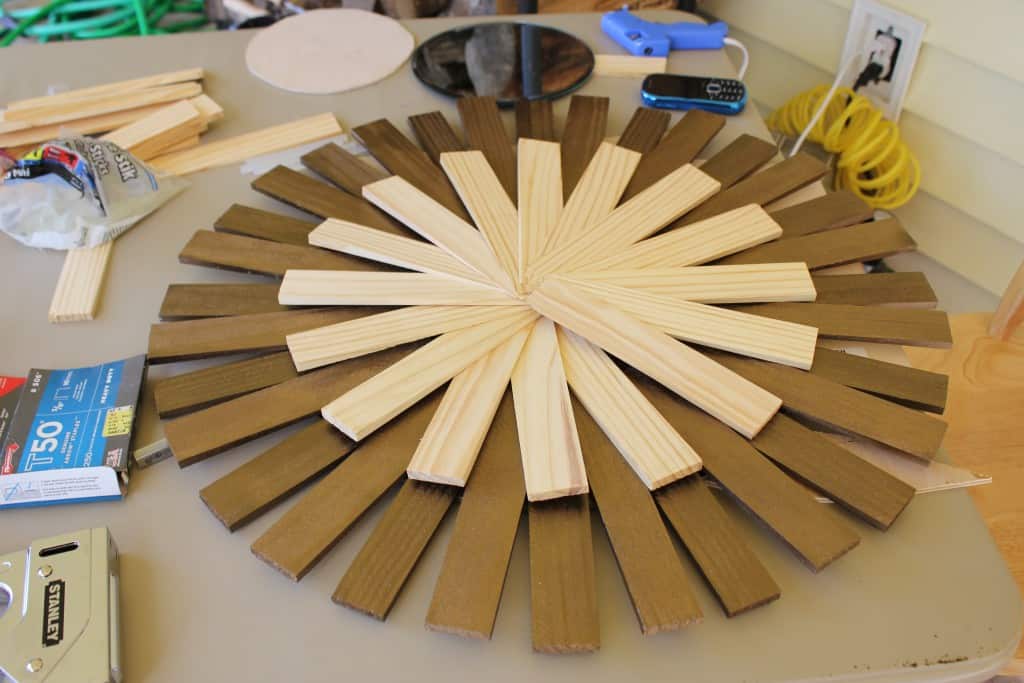
Step Three: Lay out the Design for Your Mid-Century Mirror With the Wood Shims
Next, you will need to design the layout for your sunburst mid-century mirror. Here is my first layer of wood shims. I traced the 8 inch diameter mirror in the middle to determine where to line them up. After gluing the first layer down, I went ahead and sprayed the wood shims to ensure full coverage. Repeat for each additional layer of wood shims.
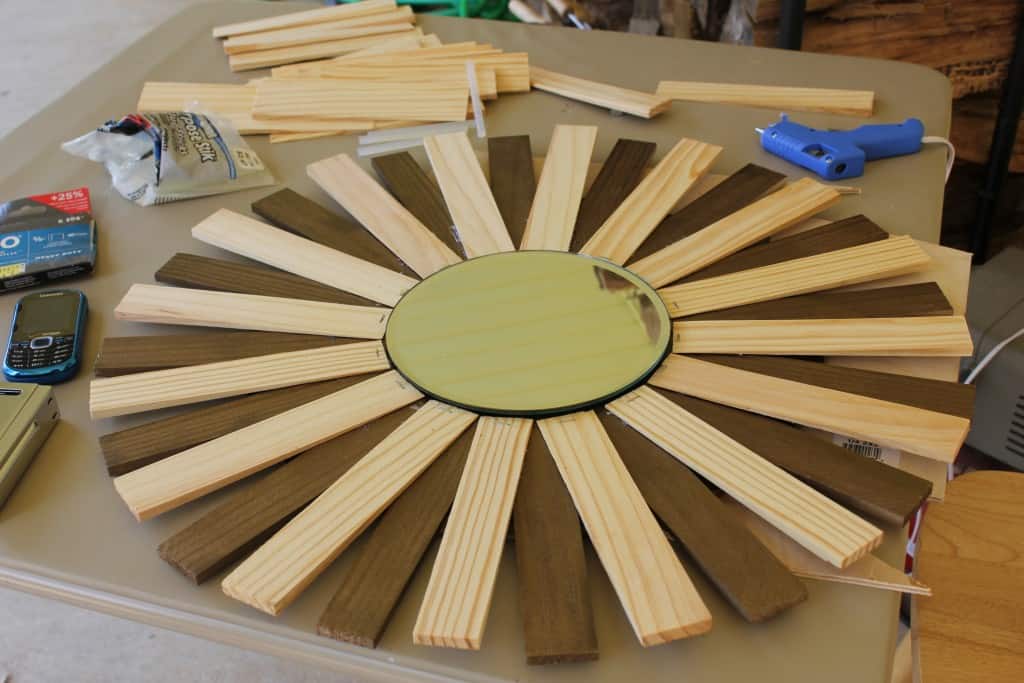
This is after I added the second layer of shims. I placed the mirror on there to show that you could actually stop at this point and it would be really lovely. All you would have to do is to add some kind of trimmings around the mirror to cover up the staples. I liked it, but I was really wanting a lot of dimension, so I kept going with another layer.
Step Four: Secure all the Wood Shims in Place
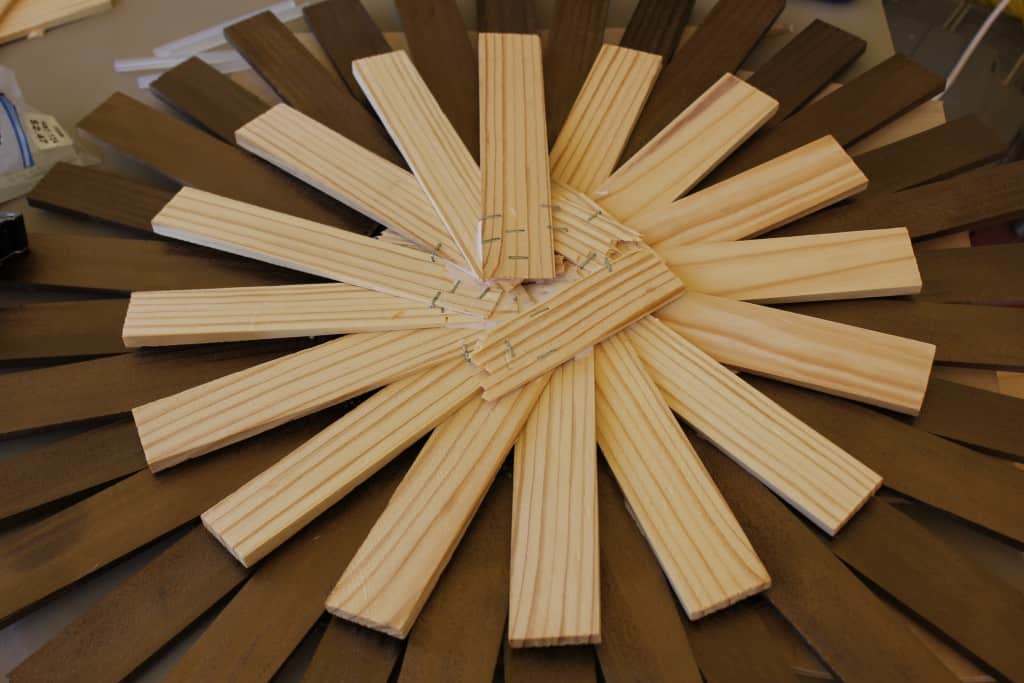
At this point, I was just ‘dry fitting’ my third layer. I highly recommend that you dry fit the entire project before you commit to glue/staples/hot glue. This way, you know what you are getting yourself into. I did so several times before determining this is what I wanted. If you could figure out a way to attach the shims just like this, it would be a really nice decorative piece.
However, I did NOT figure out how to attach the wood shims for my mid-century mirror in a way that didn’t appear to be a rat’s nest. This is how it ended up looking after attaching all of the shims with wood glue and staples. It was looking a little sloppy at this point.
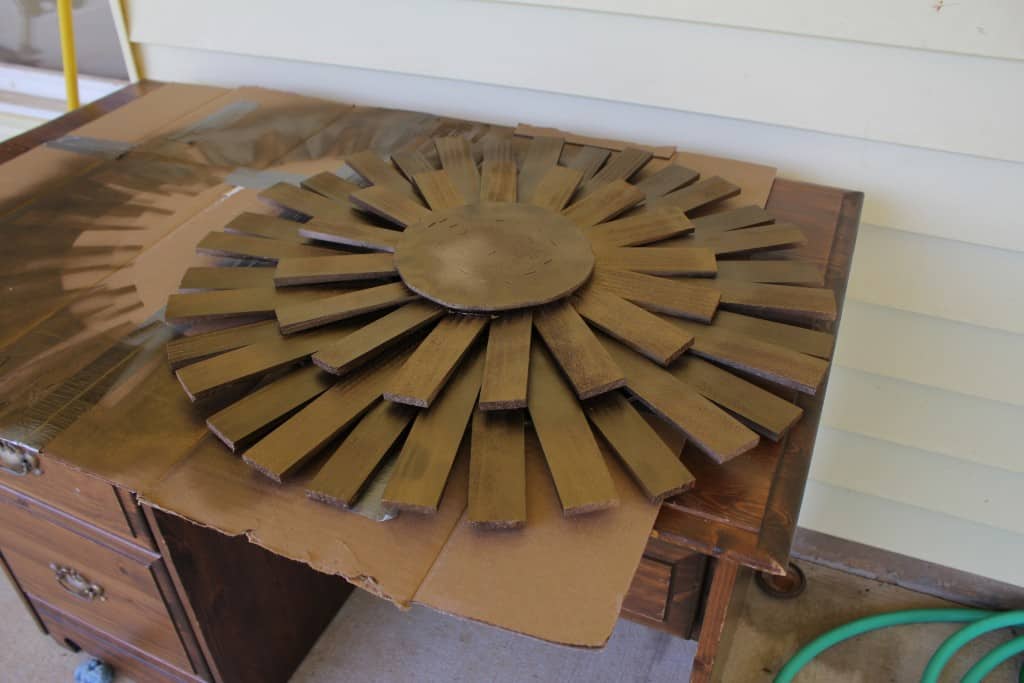
Step Five: Attach the Second, Smaller Circle Wood Cutout Over the Wood Shims with Staples and/or Glue
This is where the second 8-inch wood circle comes into play. It hides the mess underneath and provides a surface to attach the mirror. Just make sure it is firmly secured with staples.

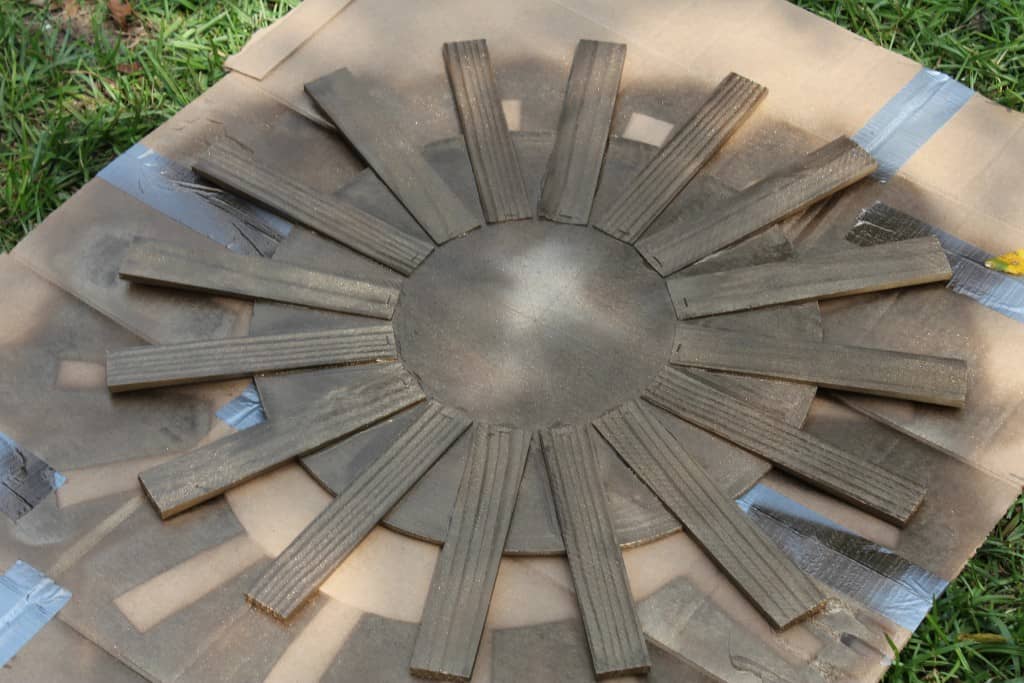
Step Six: Spray Paint all the Layers of Wood Shims and Backer Boards
As I said, I chose to spray paint after attaching each layer, but you could just as easily wait until everything is attached. In hind sight, that might would be a quicker way to approach this project so that you don’t have to wait for paint to dry several times.
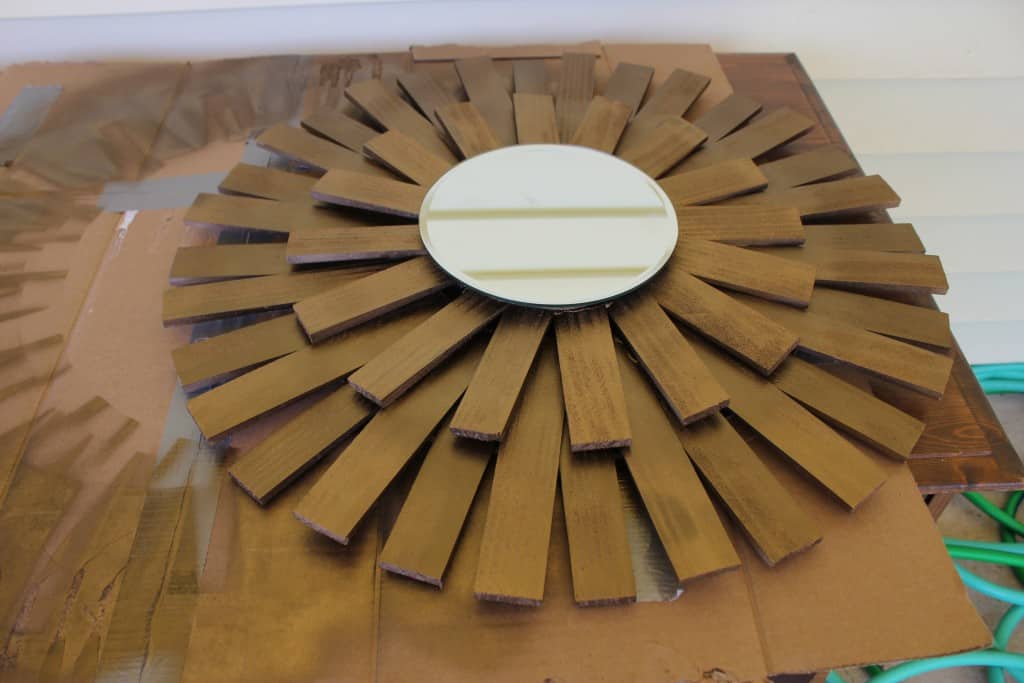
Step Seven: Attach Mirror to Backer Board with Mirror Mastic
Lastly, you will need to attach the mirror to your mid-century modern mirror with mirror mastic using a calk gun. Mirror mastic is just a type of glue that is safe to use on the backs of mirrors. At this point, you could also add trim or some sort of decoration around the mirror itself, but I was really happy with the end results without any extra embellishment.
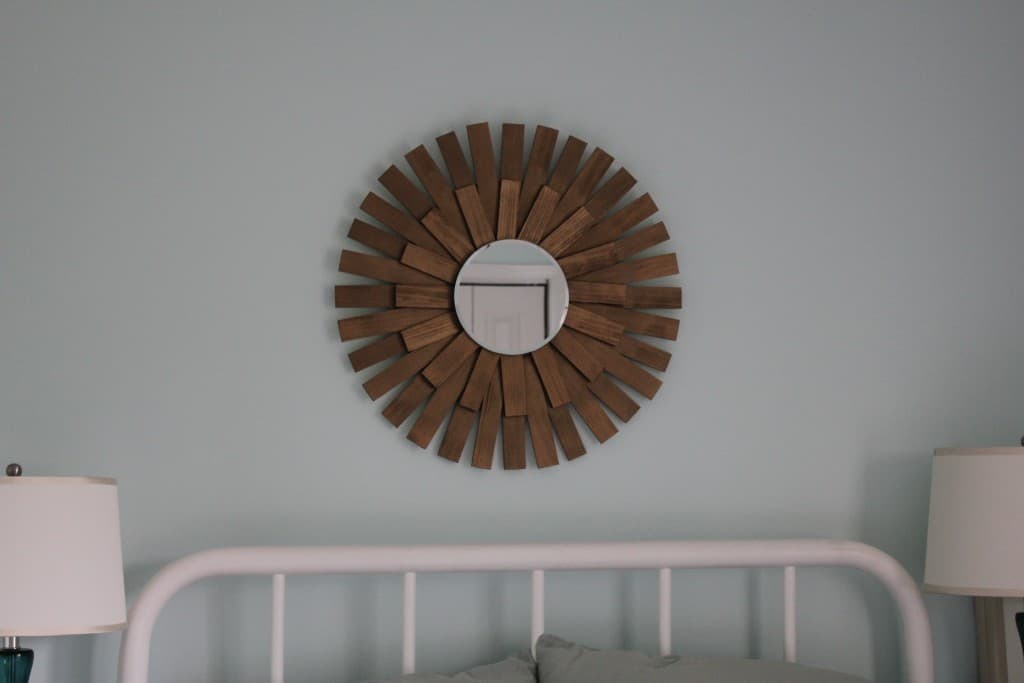
DIY Mid-Century Modern Mirror – In Conclusion:
Wrapping up this little DIY project to create a mid-century modern mirror, I hope you enjoyed it! It was a really fun project and a super frugal way to add custom decor to my guest room. The final cost was less than $30. I hope this inspires you to take on a project that will make your heart come alive and add some beauty and sparkle to your home.
If you do attempt this project, I would absolutely LOVE to see how it turns out for you! If you have any other frugal diy home decor project ideas for us, let us know in the comments! Happy DIY-ing!
Feeling Inspired? Pin It For Later!
Shanna you are amazing!! I love this project and so creative keep on doing what you do
Thanks Pam!!!!
Lovely sharing. It is really informative and essential.